Matthew Regis
Introduction
When .NET Aspire came out in May 2024, I wasn’t sure what it was solving. But after digging in and trying it out, it clicked. In this post, I’ll walk through my experience integrating Aspire into a real-world event-driven microservice, regis-pay (https://github.com/reggieray/regis-pay) which is an example event driven microservice.
What is .NET Aspire?
.NET Aspire simplifies building interconnected .NET apps by orchestrating services, providing ready-to-use integrations, and offering tooling that mirrors real-world environments—all designed for fast, flexible development 🚀
This is a shortened sentence on my take on .NET Aspire. I still think there isn't a one liner that could do .NET Aspire justice, so that will have to do for now, but to try and understand more you can go to the the official documentation https://learn.microsoft.com/en-us/dotnet/aspire/get-started/aspire-overview
Reminder of Regis Pay 💸
Regis Pay is a sample event-driven microservice architecture built on .NET, showcasing:
- Transactional Outbox pattern using Azure Cosmos DB
- Event Sourcing with Cosmos DB as the event store
- Change Feed Processor to pick up domain events from Cosmos DB changes
- RabbitMQ with MassTransit for messaging
- FastEndpoints for API endpoints
The services included are:
- API: Accepts client payment commands, writes events to the event store
- Change Feed Processor: Detects new events and publishes integration events
- Event Consumer: Processes events, interacts with third‑party systems, progresses payment workflow
Code
NOTE: As a reminder you can see the full working version here https://github.com/reggieray/regis-pay
Adding .NET Aspire to a dotnet project could be broken down into 3 stages:
- Creating a Aspire AppHost - This is the project that you run. This in turn will start all the projects within the solution.
- Service Defaults - A project that has extension methods that help set up .NET Aspire, to be used by the application within the multi project solution.
- Project Integration - Using the extension methods mentioned in step 2.
Code
1. Creating a Aspire AppHost
The code below is taken from the Program.cs file (link).
Regis pay uses RabbitMQ and CosmosDB as it's main infrastructure dependencies. To add these in you can add the following nuget packages:
Aspire.Hosting.Azure.CosmosDBAspire.Hosting.RabbitMQ
Microsoft have been hard at work creating many integrations, many of which are documented here https://learn.microsoft.com/en-us/dotnet/aspire/fundamentals/integrations-overview
In the code below you can see how it was setup, I've also configured RabbitMQ to have some enabled plugins that I wanted to use. For CosmosDB I have configured it to use the installed CosmosDB emulator version I was using, although I believe you could set it up with a docker version that spins up if you wish, you can read more about it here https://learn.microsoft.com/en-us/dotnet/aspire/database/azure-cosmos-db-integration?tabs=dotnet-cli
var builder = DistributedApplication.CreateBuilder(args);

var rabbitMqUser = builder.AddParameter("rabbitmq-user", true);
var rabbitMqPassword = builder.AddParameter("rabbitmq-password", true);

var rabbitmq = builder.AddRabbitMQ("regis-pay-messaging", rabbitMqUser, rabbitMqPassword, port: 5672)
    .WithLifetime(ContainerLifetime.Persistent)
    .WithManagementPlugin(15672)
    .WithEnvironment("RABBITMQ_PLUGINS_DIR", "/opt/rabbitmq/plugins:/additional-plugins")
    .WithEnvironment("RABBITMQ_ENABLED_PLUGINS_FILE", "/additional-plugins/rabbitmq_enabled_plugins")
    .WithBindMount(".rabbitmq-plugins", "/additional-plugins");

var cosmos = builder.AddConnectionString("cosmos-db");

var mocks = builder.AddProject<Projects.Regis_Pay_Mocks>("regis-pay-mocks")
    .WithHttpCommand(
        path: "/toggle-errors",
        displayName: "Toggle errors",
        commandOptions: new HttpCommandOptions()
        {
            Description = """
                Toggles mocks endpoint to return errors.
                """
        });

var api = builder.AddProject<Projects.Regis_Pay_Api>("regis-pay-api")
    .WithReference(cosmos);

builder.AddProject<Projects.Regis_Pay_ChangeFeed>("regis-pay-changefeed")
    .WithReference(rabbitmq)
    .WithReference(cosmos);

builder.AddProject<Projects.Regis_Pay_EventConsumer>("regis-pay-eventconsumer")
    .WithReference(cosmos)
    .WithReference(rabbitmq)
    .WithReference(mocks);

builder.AddProject<Projects.Regis_Pay_Demo>("regis-pay-demo")
    .WithExternalHttpEndpoints()
    .WithReference(api)
    .WaitFor(api);

builder.Build().Run();
The orchestration of application is comprised of three components, the API, Change Feed and Event Consumer with RabbitMQ and CosmosDB as the infrastructure dependencies. I have also setup the usage of a mocks project that simulates external dependencies and a demo project that allows you to test the app locally.
2. Service Defaults
To enable a project to be discovered by .NET Aspire, you need to configure it with OpenTelemetry and health endpoints. This allows Aspire to detect the service and display it in the Aspire dashboard.
using Microsoft.AspNetCore.Builder;
using Microsoft.AspNetCore.Diagnostics.HealthChecks;
using Microsoft.Extensions.DependencyInjection;
using Microsoft.Extensions.Diagnostics.HealthChecks;
using Microsoft.Extensions.Logging;
using OpenTelemetry;
using OpenTelemetry.Metrics;
using OpenTelemetry.Trace;

namespace Microsoft.Extensions.Hosting;

// Adds common .NET Aspire services: service discovery, resilience, health checks, and OpenTelemetry.
// This project should be referenced by each service project in your solution.
// To learn more about using this project, see https://aka.ms/dotnet/aspire/service-defaults
public static class Extensions
{
    public static TBuilder AddServiceDefaults<TBuilder>(this TBuilder builder) where TBuilder : IHostApplicationBuilder
    {
        if (builder.Environment.IsDevelopment())
        {

            builder.ConfigureOpenTelemetry();

            builder.AddDefaultHealthChecks();

            builder.Services.AddServiceDiscovery();

            builder.Services.ConfigureHttpClientDefaults(http =>
            {
                // Turn on resilience by default
                http.AddStandardResilienceHandler();

                // Turn on service discovery by default
                http.AddServiceDiscovery();
            });

                // Uncomment the following to restrict the allowed schemes for service discovery.
                // builder.Services.Configure<ServiceDiscoveryOptions>(options =>
                // {
                //     options.AllowedSchemes = ["https"];
                // });

        }

        return builder;
    }

    public static TBuilder ConfigureOpenTelemetry<TBuilder>(this TBuilder builder) where TBuilder : IHostApplicationBuilder
    {
        builder.Logging.AddOpenTelemetry(logging =>
        {
            logging.IncludeFormattedMessage = true;
            logging.IncludeScopes = true;
        });

        builder.Services.AddOpenTelemetry()
            .WithMetrics(metrics =>
            {
                metrics.AddAspNetCoreInstrumentation()
                    .AddHttpClientInstrumentation()
                    .AddRuntimeInstrumentation();
            })
            .WithTracing(tracing =>
            {
                tracing.AddSource(builder.Environment.ApplicationName)
                    .AddAspNetCoreInstrumentation()
                    // Uncomment the following line to enable gRPC instrumentation (requires the OpenTelemetry.Instrumentation.GrpcNetClient package)
                    //.AddGrpcClientInstrumentation()
                    .AddHttpClientInstrumentation();
            });

        builder.AddOpenTelemetryExporters();

        return builder;
    }

    private static TBuilder AddOpenTelemetryExporters<TBuilder>(this TBuilder builder) where TBuilder : IHostApplicationBuilder
    {
        var useOtlpExporter = !string.IsNullOrWhiteSpace(builder.Configuration["OTEL_EXPORTER_OTLP_ENDPOINT"]);

        if (useOtlpExporter)
        {
            builder.Services.AddOpenTelemetry().UseOtlpExporter();
        }

        // Uncomment the following lines to enable the Azure Monitor exporter (requires the Azure.Monitor.OpenTelemetry.AspNetCore package)
        //if (!string.IsNullOrEmpty(builder.Configuration["APPLICATIONINSIGHTS_CONNECTION_STRING"]))
        //{
        //    builder.Services.AddOpenTelemetry()
        //       .UseAzureMonitor();
        //}

        return builder;
    }

    public static TBuilder AddDefaultHealthChecks<TBuilder>(this TBuilder builder) where TBuilder : IHostApplicationBuilder
    {
        builder.Services.AddHealthChecks()
            // Add a default liveness check to ensure app is responsive
            .AddCheck("self", () => HealthCheckResult.Healthy(), ["live"]);

        return builder;
    }

    public static WebApplication MapDefaultEndpoints(this WebApplication app)
    {
        // Adding health checks endpoints to applications in non-development environments has security implications.
        // See https://aka.ms/dotnet/aspire/healthchecks for details before enabling these endpoints in non-development environments.
        if (app.Environment.IsDevelopment())
        {
            // All health checks must pass for app to be considered ready to accept traffic after starting
            app.MapHealthChecks("/health");

            // Only health checks tagged with the "live" tag must pass for app to be considered alive
            app.MapHealthChecks("/alive", new HealthCheckOptions
            {
                Predicate = r => r.Tags.Contains("live")
            });
        }

        return app;
    }
}
3. Project Integration
Taking the example from the API, here is usage of the extension method defined in service defaults (the previous step).
using FastEndpoints;
using Regis.Pay.Common;
using Regis.Pay.Domain;

internal class Program
{
    private static async Task Main(string[] args)
    {
        var builder = WebApplication.CreateBuilder(args);
        builder.AddServiceDefaults(); //<<--- Add this line here
        builder.Services.AddFastEndpoints();
        builder.Services.AddEventStore(builder.Configuration);
        builder.Services.AddDomain();
        builder.Services.AddCosmosDb(builder.Configuration);

        var app = builder.Build();

        app.MapDefaultEndpoints();

        app.MapGet("/", () => "Hello Regis.Pay.Api!");

        app.UseFastEndpoints();
        await app.RunAsync();
    }
}
Running
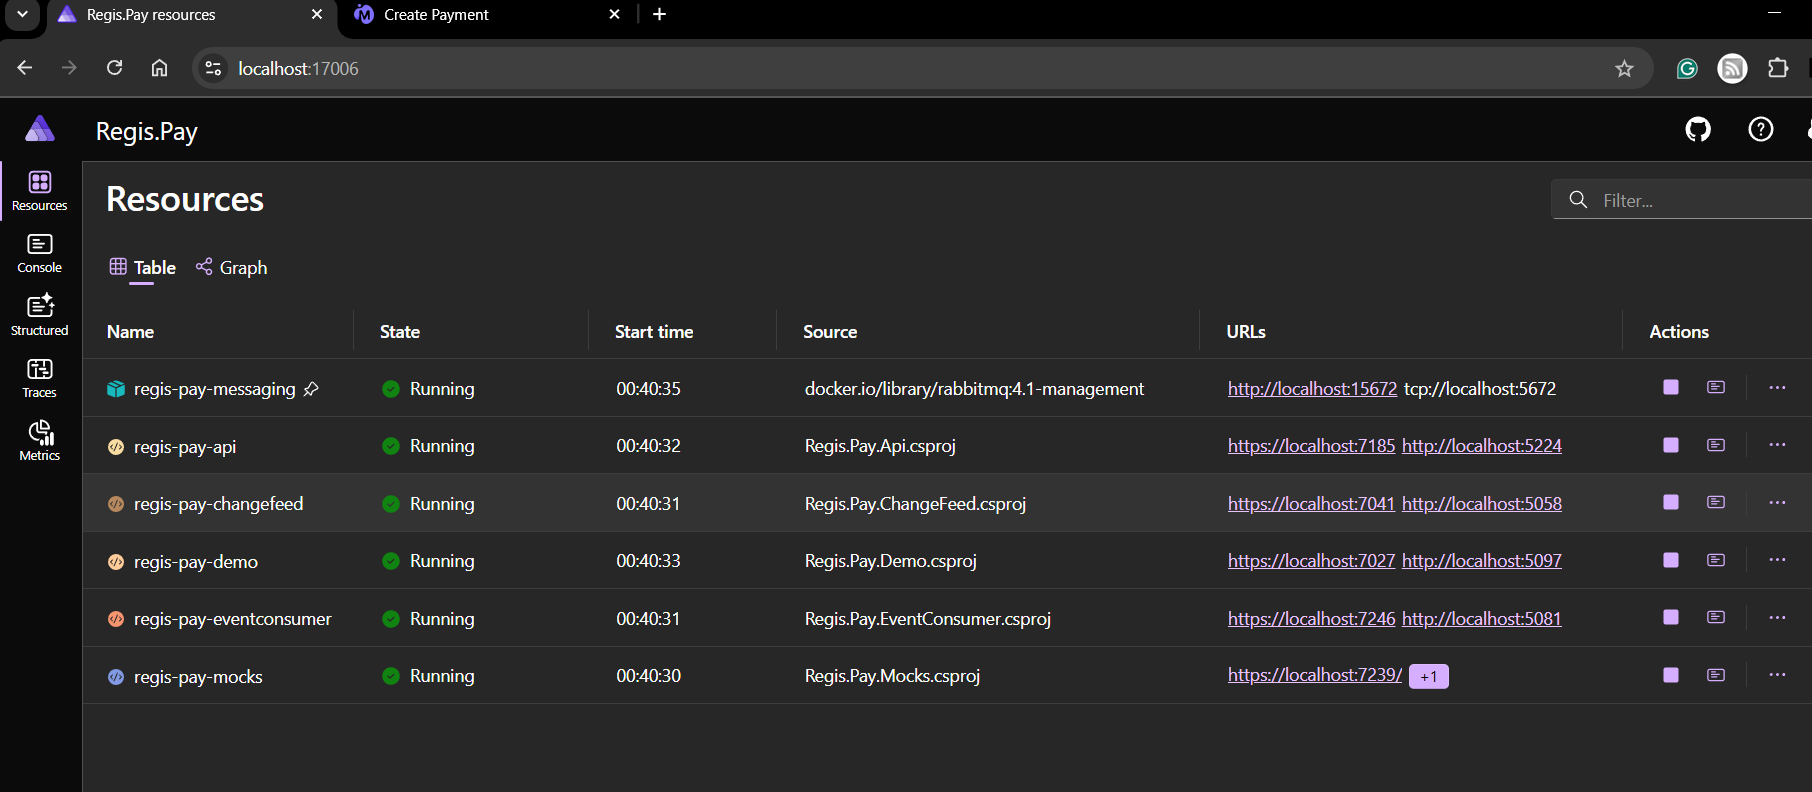
Running Regis.Pay.AppHost and you should get the following table of projects. Here you can see the state of each project and you have links to each.
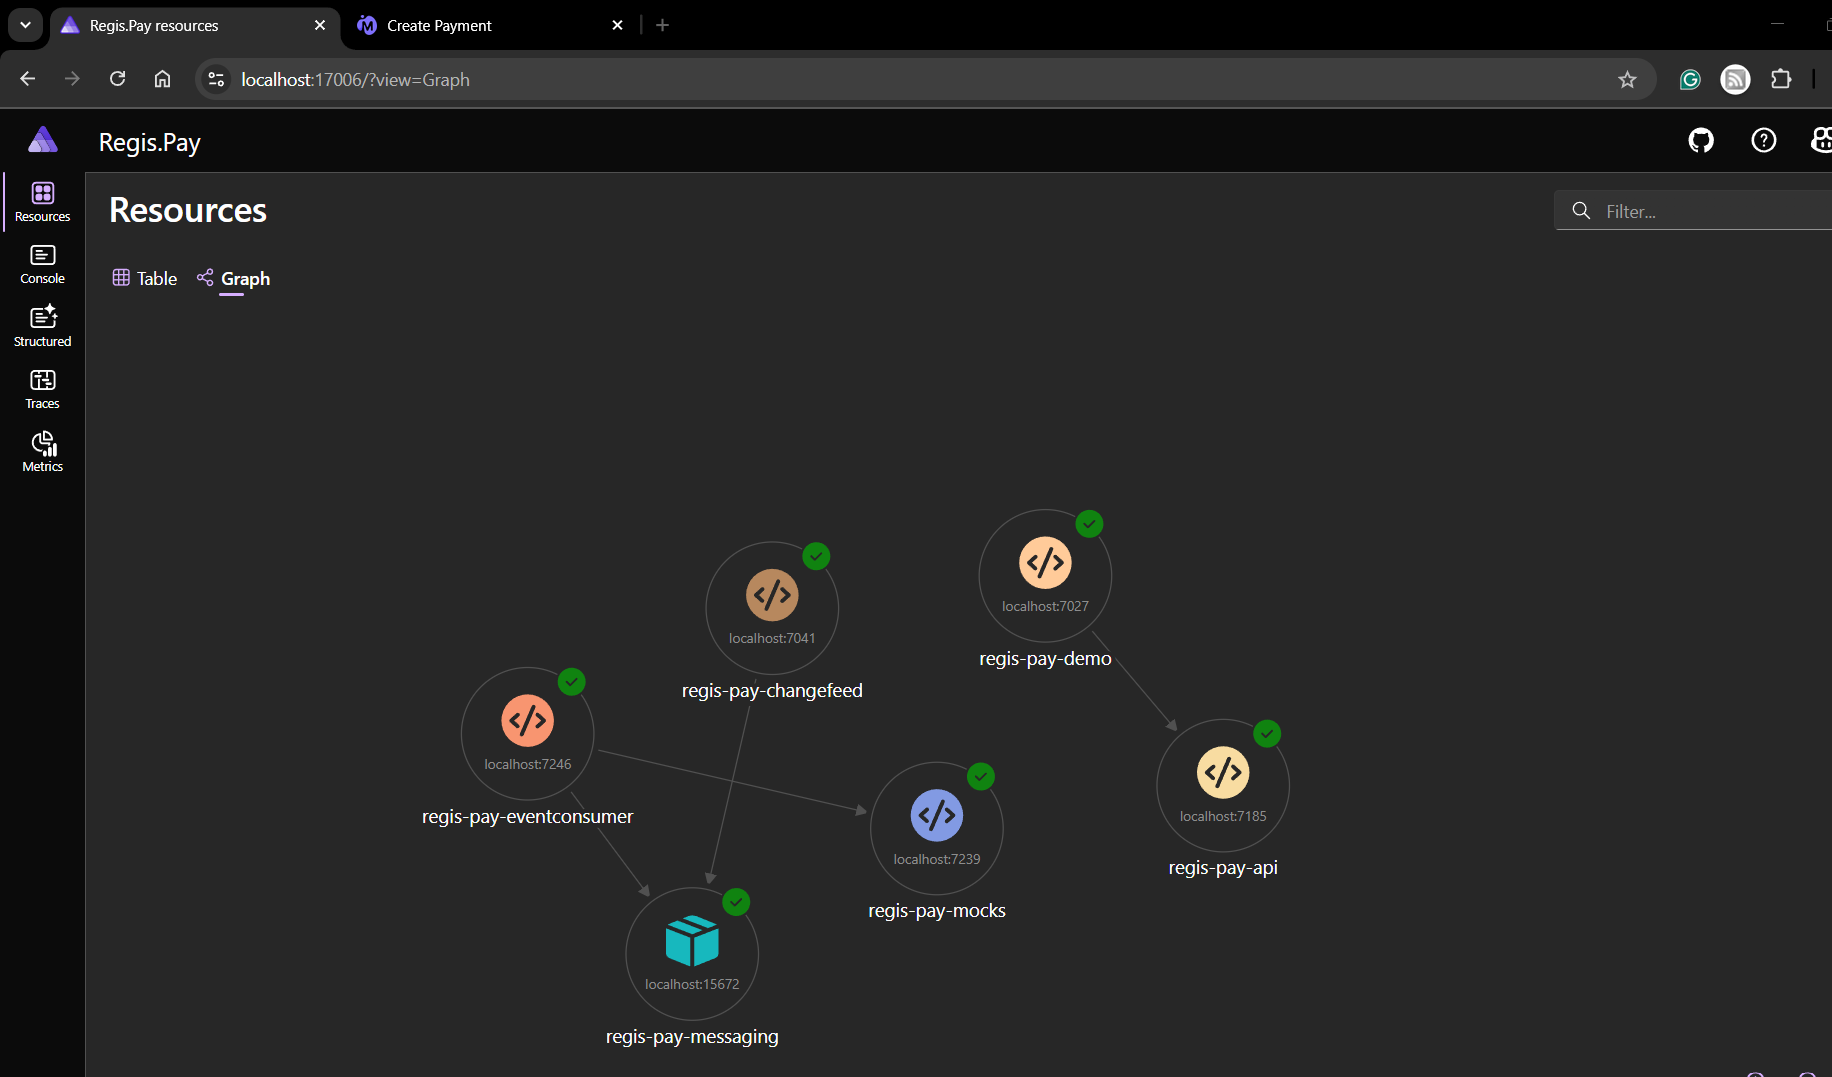
Another view available is the graph view, which gives you a visual representation of how each component interacts with each other.
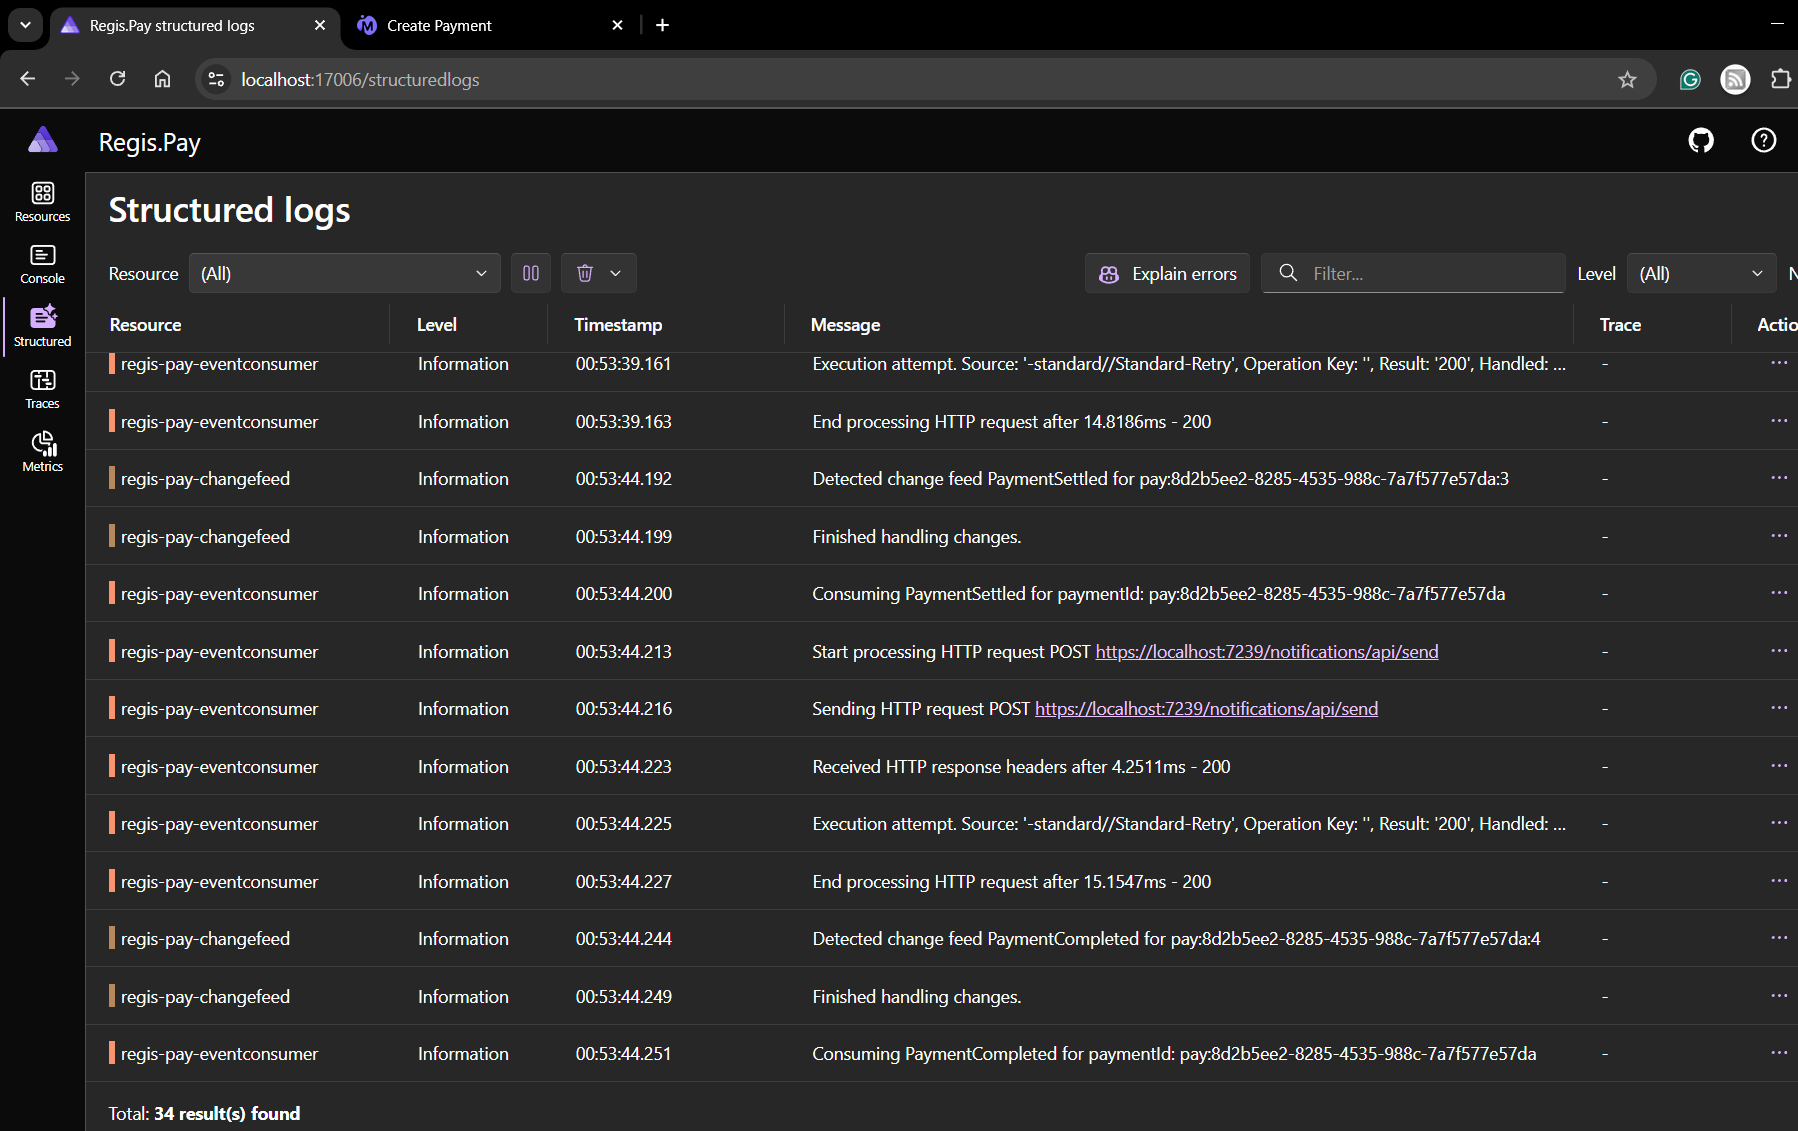
Another view is the structured logs view. This view gives a running stream of logs from all the application. This is very useful if you are working on logging.
Final thoughts
It's worth mentioning that an alternative to .NET Aspire is docker compose. It isn't a direct like for like alternative, but for local development, both can help you achieve running multi service solutions locally. In some projects I think I would prefer docker compose and others .NET Aspire, it really depends on your use case.
The strength that .NET Aspire has for me is the F5 experience. You might be wondering what the F5 experience is, it was a term I had learnt from a previous job, the idea that any new dev could get up and running locally with minimal setup.
Another strength for me is the ability to view logs of all the applications in one place, I mentioned previously if working on a logging feature between different applications, this makes it easy to visualize what is going on.
If you’re working on a multi-service .NET solution, Aspire might be exactly what you need to simplify orchestration, observability, and dev onboarding. It’s not a replacement for Docker Compose in every case—but for projects where a rich F5 developer experience matters, Aspire is definitely worth exploring.